 Having wanted to build my own Allsky camera for a long time, after months of research I decided to just go for it. Here I’ll introduce you to the components I’m using and explain why I decided on exactly this setup.
Hardware:
![Bild zeigt einen Raspberry Pi 5 mit aktiver Kühlung]() Raspberry Pi 5 with 4GB RAM, active cooling and 256 GB microSD card:
Raspberry Pi 5 with 4GB RAM, active cooling and 256 GB microSD card:
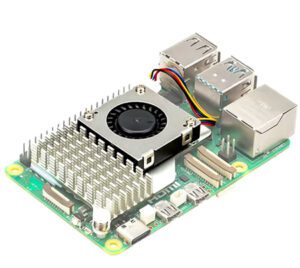 Raspberry Pi 5 with 4GB RAM, active cooling and 256 GB microSD card
The heart of my camera. The Raspberry Pi 5 offers enough computing power to continuously process the images and save them in real time. Coupled with the compact design and its wide range of connection options, the Pi 5 is the ideal Raspberry for my project. I have also installed the official heat sink with fan in case the Raspberry Pi 5 gets too warm. There is enough space on the microSD card for the operating system (see below) and for the Allsky photos and videos.
DHT22 sensor for temperature and relative humidity (incl. breakout board):
To monitor the environmental conditions, I rely on this sensor. It collects temperature and humidity data and can be easily connected to the Rapsberry Pi 5 thanks to the breakout board. In addition, the DHT22 is supported “out of the box” by the indi-allsky software, which I use in my Allsky camera. (Details here)
Raspberry Pi High Quality Camera with M12 mount:
The camera provides razor-sharp images of the sky at 12MP and is incredibly affordable. Thanks to the M12 mount, various lenses are supported, which are perfect for use in all-sky photography. (Details here)
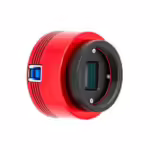
ZWO ASI678MC camera:
After I originally wanted to use the Raspberry Pi High Quality Camera for my project, I bought a used ZWO ASI678MC on eBay in the USA at an extremely low price and will use it in combination with a 2.5mm fisheye lens and f1.6 aperture. (Details here)
Waveshare WS1603212 lens (3.2mm, 160° FOV):
This wide angle lens with a 160° field of view allows me to capture a large area of the sky. I’m still considering whether to swap it for another lens, but so far it’s delivering excellent results.
All-sky camera housing from Deep Sky Dad:
The housing protects the sensitive electronics from the elements and has an integrated heating circuit that prevents the lens from fogging up or even freezing in cold temperatures.
Notebook power supply & 30m DC extension cable:
These components provide a stable power supply as the camera is mounted on a fence post in the garden, a long way from the nearest power socket.
Software:
![Bild zeigt einen Screenshot des Installationsscripts von indi-allsky]() Raspberry Pi OS Lite, without desktop (Bookworm, 64-bit):
Raspberry Pi OS Lite, without desktop (Bookworm, 64-bit):
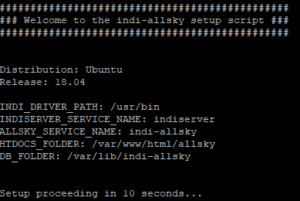 Raspberry Pi OS Lite, without desktop (Bookworm, 64-bit):
I use the stable and resource-saving Raspberry Pi OS as my operating system. It offers all the tools you need and is easy to customize. I explain the initial setup here – you can find out how to activate basic security functions here – and this is how automatic updates work!
indi-allsky by Aaron W. Morris:
This open source software controls the camera and automates the recording process. It supports a variety of cameras and sensors and has all the relevant functions on board, such as FTP upload, time-lapse, keogram and startrail generation, etc.
Website:
WordPress with customized Kawi theme:
I use WordPress with a customized Kawi theme to present the images. I’m now quite familiar with the WordPress infrastructure from various projects, and there are also an incredible number of plugins that extend the range of functions almost indefinitely.
Integrated FTP upload function from indi-allsky:
This function allows me to upload the images directly from the camera to my web server and make them publicly available.
Custom scripts and plugins:
I use various self-developed scripts and plugins, e.g. for the compression of the Allsky images and thumbnail generation, the automated “cleaning out” of the FTP server and for the playout of photos and videos from the Allsky camera within the WordPress system.