Since I have only found a few complete instructions, I will describe here step by step the installation of the indi-allsky software as I have done it. These instructions are aimed specifically at users of a Raspberry Pi and are based on the indi-allsky documentation. This is available on github in the corresponding repository. The instructions refer to the largely automatic process, how exactly the manual installation is carried out can be found in the indi-allsky wiki on github. For the Raspberry Pi 5, the automatic installation went smoothly.
Requirements
Before we start with the installation, make sure that your Raspberry Pi is ready for use and that the latest version of **Raspberry Pi OS** is installed. You will also need the following hardware:
- Raspberry Pi 5 with Pi OS (64-bit) installed (instructions here)
- A camera, such as the Raspberry Pi High Quality Camera (see here for information)
- If necessary, sensors such as the DHT22 sensor for temperature and relative humidity (for information see here)
- A suitable lens for all-sky images
- A stable Internet connection (it may make sense to connect the Pi directly to the rooter via Ethernet)
Step 1: Prepare the system
Before you install *indi-allsky*, you should make sure that your system is up to date. Open a terminal and execute the following commands:
sudo apt update
sudo apt upgrade
This will update all installed packages.
Step 2: Install Git and clone repository
To install indi-allsky, you need the “git” tool to clone/copy the repository. The installation is done via SSH as follows:
sudo apt install git
Now copy the indi-allsky repository to your Raspberry Pi:
git clone https://github.com/aaronwmorris/indi-allsky.git
Then change to the newly created directory:
cd indi-allsky
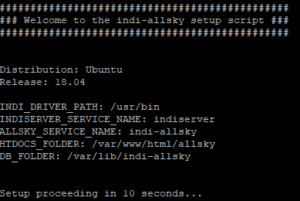
![Bild zeigt einen Screenshot des Installationsscripts von indi-allsky]() Step 3: Start the installation script
Step 3: Start the installation script
 Step 3: Start the installation script
Start the indi-allsky installation script with the following command:
./setup.sh
The installation will then run and ask, among other things, whether indi-allsky should be started automatically when the Raspberry is started. In addition, you must enter the longitude and latitude of your Allsky camera (you can read how to find out this information here) and set a user name and password.
Optional step 3A: Install additional packages
In my case, a few error messages then appeared indicating that additional software needs to be installed. The best way to do this is with the following command chain:
   sudo apt-get install lsb-release libc-bin whiptail

    # Ubuntu only
    sudo apt-get install software-properties-common
Then start the installation script as described in step 3.
Optional step 3B:
It may be necessary to compile indi-allsky first, i.e. have it compiled for your system. To do this, call the following script:
./misc/build_indi.sh
Depending on the Raspberry, this process takes between 20 minutes (Raspberry Pi 5 with 4 GB RAM) and 4 hours (Raspberry Pi 3 with 1 GB RAM). A heat sink is recommended for the Raspberry 5, otherwise it will get really hot.
If you only want to use the Raspberry HQ camera based on the libcamera framework already integrated on your Raspberry Pi, you can also use the following command:
BUILD_INDI_CORE=true BUILD_INDI_3RDPARTY=false ./misc/build_indi.sh
This compiles an installation that only contains the INDI core library. This process takes approx. 10-15 minutes depending on the system and memory.
You will also have to call the installation script again as described in step 3.
Step 4: Starting *indi-allsky*
As soon as the configuration is complete, you can start *indi-allsky* with the following command:
./start.sh
This will start the software. An input mask should then appear via your Internet browser at https://raspberry.local, in which you must enter your user name + password. The user interface will then open like a normal website. The good news is: If you are happy with the “standard installation” and everything is running, you may never need to see the console or terminal or type any commands again. However, one command still makes sense to deactivate the automatic pixel error detection – the “Starkiller Killer” (instructions).
Otherwise you can simply operate the Allsky interface via your browser, you can even switch off or restart your Raspberry with the software.
Details on configuration, how to focus the camera etc. can be found in the following blog posts:
- Basic setup of the indi-allsky website (in progress!)
- How to focus the camera (in progress!)
- How to set up the FTP upload (in progress!)
- How to customize the image caption (in progress!)
For more details and advanced configuration options, check out the official documentation on the project’s GitHub page.