Since I have only found a few complete instructions, I will describe here step by step the installation of the indi-allsky software as I have done it. These instructions are aimed specifically at users of a Raspberry Pi and are based on the indi-allsky documentation. This is available on github in the corresponding repository. The instructions refer to the largely automatic process, how exactly the manual installation is carried out can be found in the indi-allsky wiki on github. For the Raspberry Pi 5, the automatic installation went smoothly.
Why I chose indi-allsky as the software for my Allsky camera
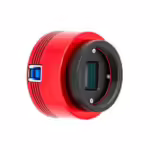
![]() For an allsky camera, you need the corresponding software – the hardware alone may look more or less fancy, but it won’t do you any good at first. In the end, after a lot of research, I opted for indi-allsky, closely followed by allsky by Thomas Jacquin.
For an allsky camera, you need the corresponding software – the hardware alone may look more or less fancy, but it won’t do you any good at first. In the end, after a lot of research, I opted for indi-allsky, closely followed by allsky by Thomas Jacquin.
There are many software solutions that offer different functions – essentially…
imx477.dpc_enable=0 – or: The Starkiller – Killer
After installing indi-allsky, you can make almost every setting via the user interface. However, there is one tweak that I made directly in the Raspberry Pi OS via the console. I run this under “Starkiller-Killer” – without any reference to Star Wars: The libcamera framework, which enables the Raspberry Pi HQ camera to be controlled, sometimes “kills” smaller stars because it thinks they are pixel errors in the camera sensor. And this is how it works:
Howto: Securing the Raspberry Pi 5
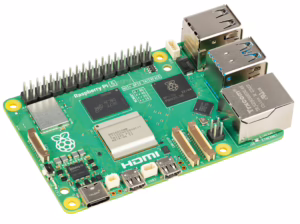 With its versatility and extremely compact size, the Raspberry Pi is ideal for my Allsky camera project. However, as with any internet-enabled device, protection against potential attacks is crucial. Here are what I consider to be the most important measures to ensure the security of a Raspberry Pi 5:
Allsky camera: My basic setup
 Having wanted to build my own Allsky camera for a long time, after months of research I decided to just go for it. Here I’ll introduce you to the components I’m using and explain why I decided on exactly this setup.